Logo White
Mentor Moments

by

Scott Ferris

HOME

ABOUT US

GALLERY

NEWS AND INFORMATION

CALENDAR

PHOTO OPPORTUNITIES

CONTACT US

BLINKIES??

July 10, 2016

Do you use 'blinkies' on your camera for review purposes, if not, why not?

Blinkies, or highlight warnings, are an excellent tool to use to review your exposures out in the field.  One of the truly liberating aspects of digital photography is the ability to see what we took instantly.  The trouble is variations in screen brightness and ambient light range don't help us accurately judge our exposures.  Luckily there are two very useful in camera tools to help, the histogram and blinkies.  The more powerful histogram takes a greater understanding of what it represents to use 'on the fly', but the blinkies just flash where pixels are overexposed to give us an instant check for lost detail.

Remember, there is nothing inherently 'bad' about overexposed pixels, if that is what you want.  Just remember when you get overexposed pixels, especially in a block, there is no detail in that block and post processing generally can't 'fix' it. 

So how do we see these blinkies? On a Canon go into the 'Menu-Playback (the blue options) and look for the 'highlight alert' option then just select 'enable'.  On a Nikon look under the ' enu-Playback Menu-Playback Display Options-Highlights' and tick the box. Nikon users can often select on or off during playback by going left or right on the rear controller too.  For other types of cameras consult your manual or do a quick Google search with your make, model and the word "blinkies".

Now take a picture with some overexposed highlights and look at the review. You might initially find that distracting, but run with it for a week or two and you should find it helps a lot with your exposure. Remember, you will get much better image quality if you slightly overexpose in camera and then lower the exposure in post rather than the other way around, understanding this and using blinkies can really help your pictures.


MODES! THE FIRST IN A SERIES OF POSTS ABOUT MODES

July 24, 2016

Aperture Priority, Shutter Speed Priority, Program and even the dreaded and much argued about Manual Modes seem to cause much confusion and anxiety when they all do essentially the same thing!  So let go of the peer or self imposed pressure to use a mode recommended by this pro or that blogger.  

There is no right or wrong 'Mode' to use.  All the modes are making choices and trade-offs between ISO, aperture and shutter speed.  You will soon realize you can use any mode in any situation to get the result you want so just use the one that makes the most sense to you.

An exposure is made up of three factors:  shutter speed, aperture and ISO.  Think of an exposure as drawing a bath, or running a bath in English. Shutter speed is equivalent to how long you leave the faucet open; the longer it's open the more water in the bath.  Aperture equates to how far you open the faucet, and the wider it's open the more water you get.  ISO may seem more esoteric, but effectively it is how big your bathtub is.  A low ISO is a big tub needing a lot of water, and a higher ISO a smaller tub taking less water.  As a result, a bigger tub is going to result in a higher quality bath than a smaller one!

The meter, which helps choose the aspects of the exposure we didn't set, is going to try and fill 'the tub' just under halfway every single exposure irrespective of what is in the scene.  It doesn't know how deep we actually want the bath (how light or dark we want our picture).  It is programmed to adjust our three variables so the right sized tub is just under half full.

All a mode allows us to do is tell the camera which option we want to set.  How big the tub is (ISO), iso; how long to open the faucet (shutter speed) and how wide to open the faucet (aperture).  If we use a mode to prioritize one or more of these criteria the camera will then assign the other values.

My next post will go a little deeper on modes and when one might make more sense than another.  Later I'll introduce the concept of Exposure Compensation, EC, in our tub analogy that would be how deep or shallow we want our bath :-)


MODES PART 2 -    THE POORLY UNDERSTOOD 'P' MODE

August 7, 2016

The poorly understood and unjustifiably maligned 'P' Mode. Now we will begin looking at each Mode and when one might be more appropriate than another starting with 'P' or Program mode. 'P' mode gives you more control over your exposure than 'Auto' mode. (The green square on a Canon designates Auto mode.) Traditionally in 'P' Mode you choose the ISO and the camera sets the shutter speed and aperture. Remember our bathtub analogy? You can quickly change those settings to a more appropriate one for your image and the camera will still fill our bath up to just under halfway! Lets use a few exposure examples. As I write this with my camera in 'P' Mode I set my ISO at 100 and the camera has set my exposure at 1/250 second with an aperture of f5.6. It chose those values for a middle ground balance between shutter speed and aperture values. To get the same exposure all of the combinations below will give you the same amount of light!

Exposure Equivalents

For a different setting all I need to do is roll the dial next to the shutter button and the camera will scroll through all these different exposure combinations! So if I want more depth of field I turn that dial to give me a higher aperture value, but at the inevitable cost of slower shutter speeds. If I want a faster shutter speed I turn the dial the other way but there will be correspondingly less depth of field. 'P' Mode is like having the best of both aperture priority and shutter speed priority modes at the same time! So when is 'P' mode a good choice? Anywhere you want the camera ready in an instant but where the subject matter or compositional priority between shots will vary. So field trips, vacations, street photography, and events, especially when using a zoom lens, are all times to use the 'P' mode. Next time shutter speed priority and when to use it. Also, at the end of this series on Modes I'll mention all that technology has added to the exposure equation. Remember all the modes do is determine the optimal ISO, aperture and shutter speed faster. If they aren't doing that they are just getting in your way so practice with another method that is more intuitive to you. Just because your camera has umpteen Modes doesn't mean you need to be proficient in every one of them. Please email me any questions via the club.

MODES PART 3 - APERTURE PRIORITY

August 21, 2016 

Now we will look at Aperture Priority,  designated as Av for Canon,  A for Nikon, and the Mode I use most often.

In aperture priority we set the ISO (how deep we want our bath) and the Aperture (how open our faucet) and the camera works out what shutter speed to use (how long to leave the faucet running) to attain consistent exposure.

As you know the Aperture setting allows us to prioritize the depth of field, or how much of the scene is in acceptable focus. For landscapes, we might want everything from a foreground flower to a mountain range in focus so we would choose a ‘smaller’ aperture value, something like f16 or f22.  This can result in a long shutter speed and we may need a tripod to get sharp images. On the other hand, if we are taking a portrait and trying to isolate the subject by blurring the background a ‘wider’ aperture like f1.4 or f2 will work better.

But we can also use Av/A Mode to get our fastest shutter speed in changing light.  For instance, while taking pictures of birds in flight where clouds keep the light values changing if we select our lenses widest aperture (lowest number), then the camera will select the fastest appropriate shutter speed to get a consistent exposure.  This means we can concentrate on getting the framing and focus right and not think about the exposure.

Now a really nice modern twist on camera control and auto exposure is Auto ISO. This works particularly well in the above scenario.  Again we want to take pictures of birds in flight and with the fastest shutter speed to prevent motion 
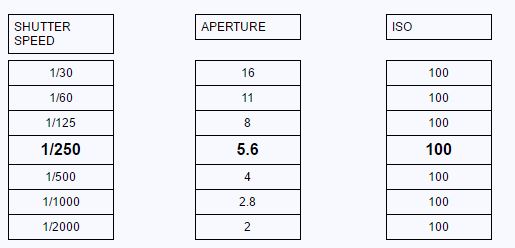
blur and the lowest ISO to maintain image quality.  We would set our camera to our 150-600mm lens’ widest aperture, f5.6, choose Auto ISO and the camera will set the shutter speed over 1/500 sec because it knows the focal length being used.  Then if the light drops too much, rather than drop the shutter speed and cause motion blur, the camera will increase the ISO to maintain the fast shutter speed.

 I’ll cover Auto ISO in more detail later but the next installment will be shutter speed priority, Tv for Canon users and S for Nikon users. But in the meantime have a play with Aperture priority, it is amazingly flexible and if I could only use one mode is probably the one I’d pick.

 Don’t forget to bring your camera to all the meetings and whenever we have time we will cover whatever we talked about in the last newsletters. Practice makes perfect and 10,000 hours practice make a master :-)


MODES PART 4 - SHUTTER PRIORITY

 September 11, 2016

Going back to our tub analogy where how open the faucet is corresponds to the aperture, and the depth of water we want in our tub equates to the ISO, the simplest aspect of our exposure triangle to get our heads around is shutter speed, or how long we leave the faucet open.

So when would we prioritize shutter speed by setting a speed and letting the camera decide the aperture? The key use is when you have a subject in motion and either to need a set shutter speed to prevent motion blur or a speed to allow a certain amount of subject blur.

One example would be one of our regular subjects, birds in flight. If you know it takes 1/800 second to freeze the tips of the wings when taking pictures of a pelican then you would set that as your shutter speed and let the camera take care of the rest. Or if the subject is soccer players, and you know a running person's foot has a small amount of blur at 1/300 second then go for that speed.  If you don't know what shutter speed you need to get the freeze you want then take a few test pictures at different shutter speeds and zoom in on the review screen on the back of your camera.

Conversely if you want subject motion, like at a fairground at night or moving traffic for light trails,  or to show flowing motion of a wedding reception first dance then choose slower speeds.  I'll use several seconds for fairground lights to over one minute for traffic trails, to 1/4th to 1/30th second at wedding receptions.

 Other scenarios where I would use shutter speed priority would be an airshow where there are propellor driven planes to make sure I get a good amount of blur in the propellor (the 'rule' is a full circular blur).  Another is taking images of moving cars or motorcycles where, if the shutter speed is too high, then the background and the wheels are so sharp it looks like the subjects are stationary. 

The main point is to be deliberate, go out with the intention of taking a specific type of image and take control of your camera to make it deliver those images.

Don't forget to bring your camera to our regular meetings, if we have time we can always play with these various modes and gain the familiarity we need with our cameras to help get the results we want when we go out taking pictures.


 MODES PART 5 - THE DREADED M MODE!

 September 25, 2016

Manual or M Mode gets so much bad press I feel sorry for it! First, it isn't a 'professional' only thing and it isn't intimidating, it is just another camera setting that can enable us to get an image with consistency. And consistency is the byword for choosing M Mode. M Mode doesn't select any camera settings automatically, it ignores the meter reading and relies on user input to select aperture, shutter speed and ISO.

Here is a challenge, put your camera in P Mode, take a picture, and look at the shutter speed and aperture your camera used. Turn to M Mode, put the same settings in and take a picture. The picture will look the same, right? See, M Mode isn't scary; it just does what it is told and completely ignores inbuilt smart technology.

M Mode gives you complete control of your exposure so you can prioritize depth of field or shutter speed while allowing consistent exposures. What shooting situations would make you want that? On last week's field trip we had a couple of perfect scenarios. Under the covered arena the light was consistent on the dressage horse and rider but the background varied between strong backlight and shady foliage areas. This changing background could easily throw your meter reading off even though the light on the subject was consistent. To avoid this take a picture, check the subject's exposure and select the settings that give you a correct exposure for that subject. Then using those settings your exposure will be correct for any shot of that subject whether it is in front of the bright or dark background.

Another perfect example is event photography of bands or other stage performances on a stage with the subject consistently lighted but various lighting changes behind that subject. Often in these situations forward facing lights can come into our field of view and cause a camera in a metered Mode to under expose the subject. M Mode ignores that light and allows you to expose your subject consistently.

M Mode is also the best mode when using studio lights. The subject illumination will be consistent, but you control the actual exposure. This is probably where the 'M Mode is what professionals use' idea came from as many of them use studio lights. M Mode also can give you additional flexibility for more exposure compensation than the +/- 2 to 3 stops your camera allows.

M Mode has some real strengths, but, it also has some weaknesses. If the illumination on your subject is changing then M Mode won't help and you would have to constantly change your settings to keep up. Who wants that? M Mode also doesn't work as a general 'walk around' setting and can be very frustrating if you try to use it as one. Remember its strength, a consistently illuminated subject. If you are in a situation where you have that M Mode will shine and can make very difficult exposure situations simple.